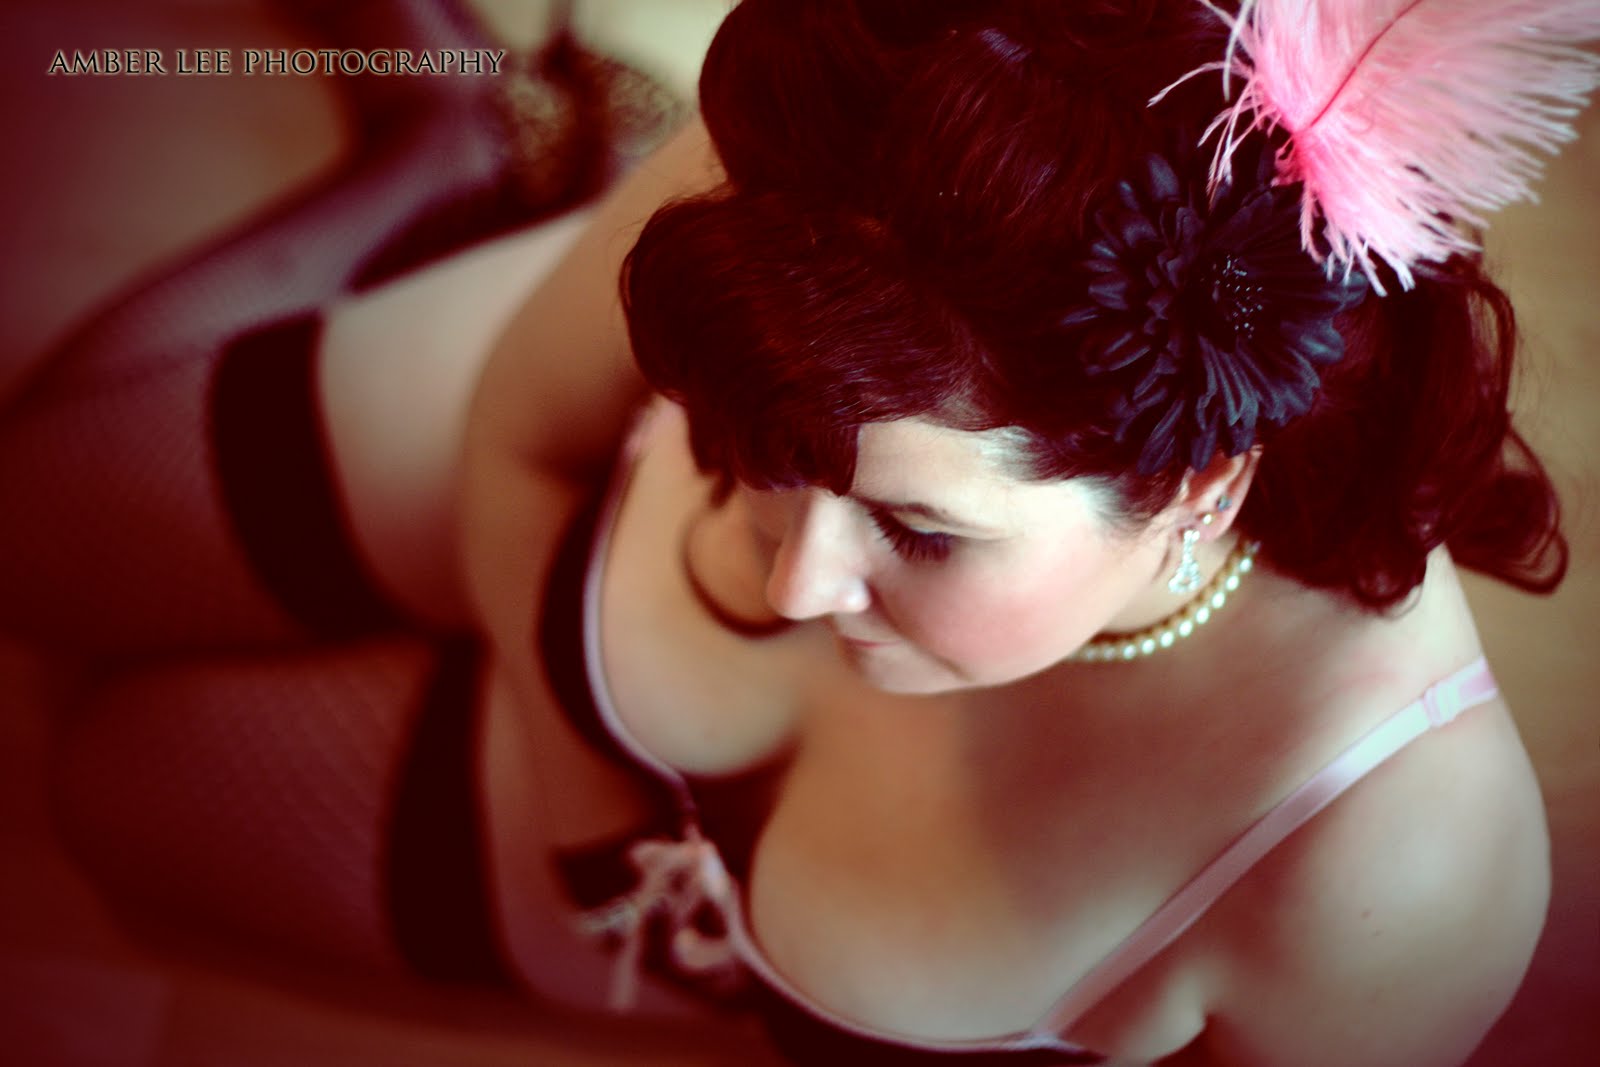
Vintage wash:

In photoshop CS4
-Open Image in photoshop
- Add new layer (command+j) or (ctrl+j on windows)
-Image → adjustments → hue/saturation
-set saturation between -50 or -55
- Add new layer (command+j) or (ctrl+j on windows)
- Image → adjustments →photo filter
- select yellow and set it to 33
- Add new layer (command+j) or (ctrl+j on windows)
- Image → adjustments → curves add an S curve to add contrast and brightness set to desired amount.
* sometimes I up the lightness in hue/saturation to about a 10 to fade the image a bit, depends on the image.

The was taken using natural lighting from the window
Cheesecake painted style pin-up:

In photoshop CS4
-Open Image in photoshop
- Add new layer (command+j) or (ctrl+j on windows)
- Image → adjustments → curves → pull curve downwards to add contrast (original photo was overexposed and I only did this step to bring the color back into the photo)
- Add new layer (command+j) or (ctrl+j on windows)
-Image → adjustments → hue/saturation
- adjust saturation to to +25
- Add new layer (command+j) or (ctrl+j on windows)
- filter →blur→surface blur
-my radius is set to 25 and my threshold is set to 17 -feel free to play around with the levels
-add a mask -at the bottom of your layers palette (square with circle in it)
- press (command + i) (ctrl +i on windows) to invert the mask (the mask should turn from white to black)
-set the opacity on the layers palette to about 60-70
-select paint brush in the tools palette and paint over the all of the skin and the skin only.
- command + option + shift + e (ctrl + opt+ shift + e on windows) to duplicate visible layers
- filter + noise + dust & scratches
- I have my radius at 6 and threshold at 2
- add mask
- invert mask (command + i) or (ctrl + i on windows)
- set the opacity on the layers palette to about 60-70
- select paint brush at a small size
- zoom in on your image to about 200%
- brush over any imperfections that were left behind
- command + option + shift + e (ctrl + opt+ shift + e on windows)
- select your paint brush→ brush opacity at 10-20% → choose white as your foreground
- zoom in on the eyes and paint the whites of the eyes to make them stand out.

* I decided after I finished the image that I needed to add a little more saturation and contrast
The look is an over saturated smooth look "painted" look
Shot using continuous lights.
Glam-y Hollywood star black and white:

In photoshop CS4
-Open Image in photoshop
- Add new layer (command+j) or (ctrl+j on windows)
- Image → adjustments → black&white
-in your black and white options: set magenta to -62% This will make her lipstick stand out
set red to 34% This will brighten up the image a bit
set yellow to 112% This should lighten up the skin
-Add new layer (command+j) or (ctrl+j on windows)
-Image → adjustments → brightness/contrast
- adjust your brightness to -12
-Add new layer (command+j) or (ctrl+j on windows)
- Image → adjustments → curves
-play around with the curves to add contrast

-The look is bright white skin with contrasting details
-I shot this using a bounced flash (off the white wall behind me)
Seedy basement black and whites:

In photoshop CS4
Open your image up in photoshop and add a new layer - command+j on a mac
- ctrl+j on windows
-on your new layer go into Image along the top bar. →adjustments → black&white
-in your black and white options - set your reds to 92% which will lighten up a bit of the details - then set your yellows to 16% which will lighten and pull in a lot of the grain
-push ok
-add a new layer (I use command+j) (ctrl+j on windows)
-Image → adjustments → brightness/contrast
- put brightness up to 17
-push ok
- add new layer (command+j) or (ctrl+j on windows)
-Image → adjustments → hue/saturation
-bring the lightness up to +9
this is where I left it, I like the faded look. However you can add a little bit more contrast if you choose by adding another layer and going Image → adjustments → curves and playing around with the curves until you get the contrast you desire.

The look is a faded, grainy black and white
I shot this using the natural light from the window
*These specific levels are the exact steps I used when processing these. Feel free to play with the levels that is appropriate on your own photos.
♥♥♥
I will post more teasers tomorrow!